In project management, time can be your greatest enemy. But what if you could use every minute that was given to you to your advantage? That’s what the project timeline is for — and here’s how to create it from scratch.
What’s in this article?
- What is project timeline?
- What are the types of project timelines?
- How to create a project timeline?
- What are the benefits of project timeline?
- A project timeline example
- Why project timeline template in Excel is not enough for success?
What Is a Project Timeline? Definition
A project timeline is a visual representation of all the tasks and activities that are supposed to be completed in a project, as well as their duration and start and end dates.
This kind of overview provides the project manager with crucial information on all the tasks and related allocations, helping them manage projects on a more detailed level.
Why Is Project Timeline Important for Successful Project Delivery?
Changing priorities, unexpected project tasks, missed key milestones… Those are just a few of the issues that tend to plague any delivery projects. Fortunately, project timeline can help you avoid all of them.
Successful project timeline acts as a foundation for the project success. When done in the right project management tools, it can:
- Provide a clear direction and structure, allowing all the key stakeholders to what needs to be done, when, and by whom.
- Act as a complete overview of time and resource management, helping project managers avoid bottlenecks, schedule conflicts, and downtime.
- Help track project progress and avoid scope creep caused by delays and other issues.
- Improve stakeholder communication and serve as a visual tool to keep clients, executives, and team members informed.
- Boost accountability and team performance by showing the team the quickest path to success.
Types of Project Timelines
There are no two identical projects — while sometimes they may share similarities, they are never exact copies of each other. That’s why we divide project timelines into several different types based on their features.
The most popular types of project timelines include:
Historical Timelines
A historical timeline is a linear visual representation of past events or milestones, typically arranged chronologically from left to right. In some cases, such timelines also include major milestones or other important events, helping project managers evaluate project’s progression.
Historical timelines are commonly used in project timeline templates in Excel, and, as such, it is best suited for reviewing past project or managing small-scale operations. They can also be used in presentation or case studies, as they provide a general overview of critical tasks instead of in-depth perspective that’s difficult to grasp in just minutes.
Vertical Chart Timelines
As indicated by their name, vertical chart project timeline stacks events vertically in chronological order, with time flowing from top to bottom. Each item is plotted on a vertical line to represent its timing and sequence, providing a simple, but effective visual layer for task management.
Similarly to historical timelines, vertical charts are commonly used for short- to mid-term plans or their summaries – for example presentations and reports.
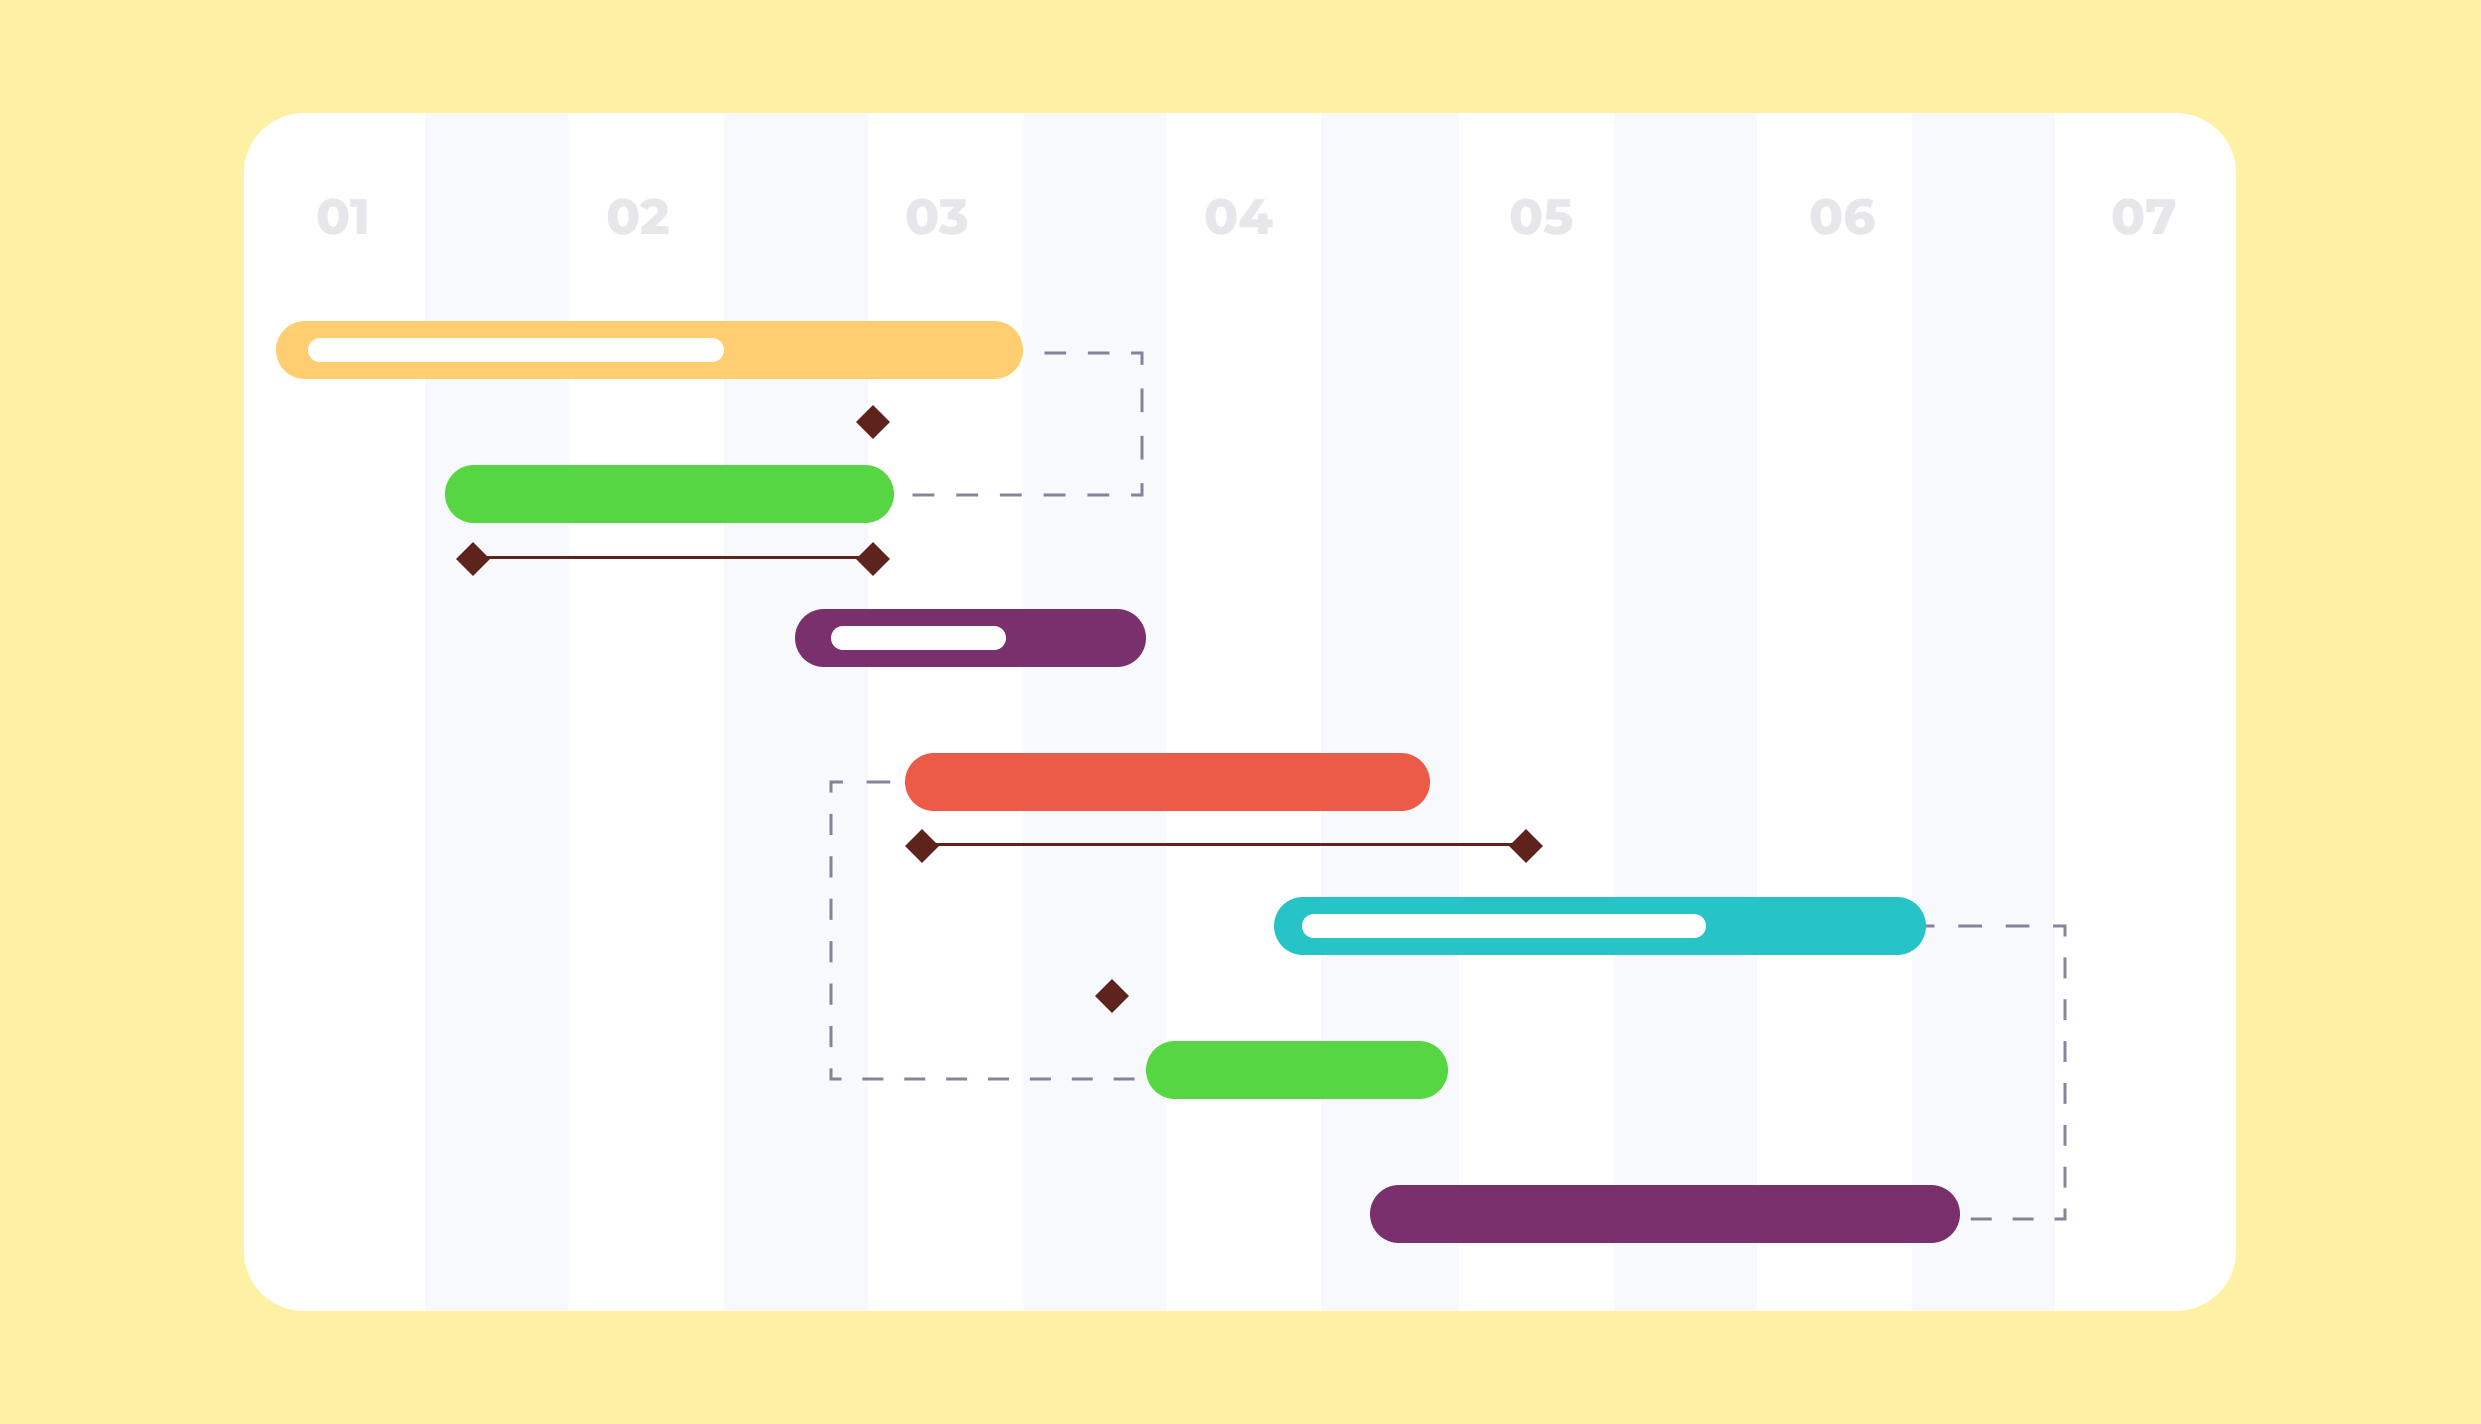
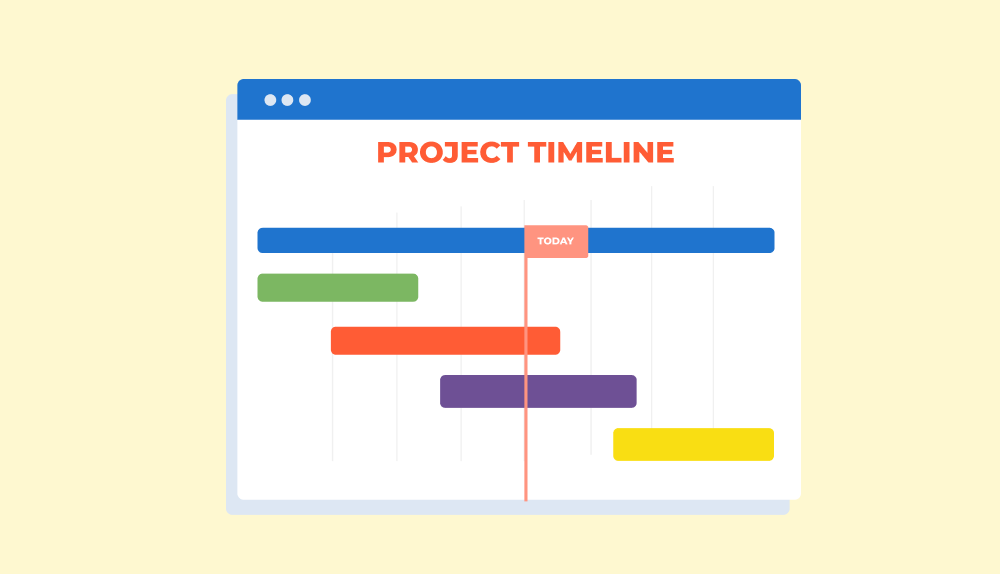
Gantt Charts
Popular especially in professional services industry, a Gantt chart is a horizontal bar chart that shows tasks, durations, start/end dates, and dependencies across a timeline. It provides an easy to digest visual overview of the project plans even for complex projects, allowing project managers to manage deadlines even for long operations.
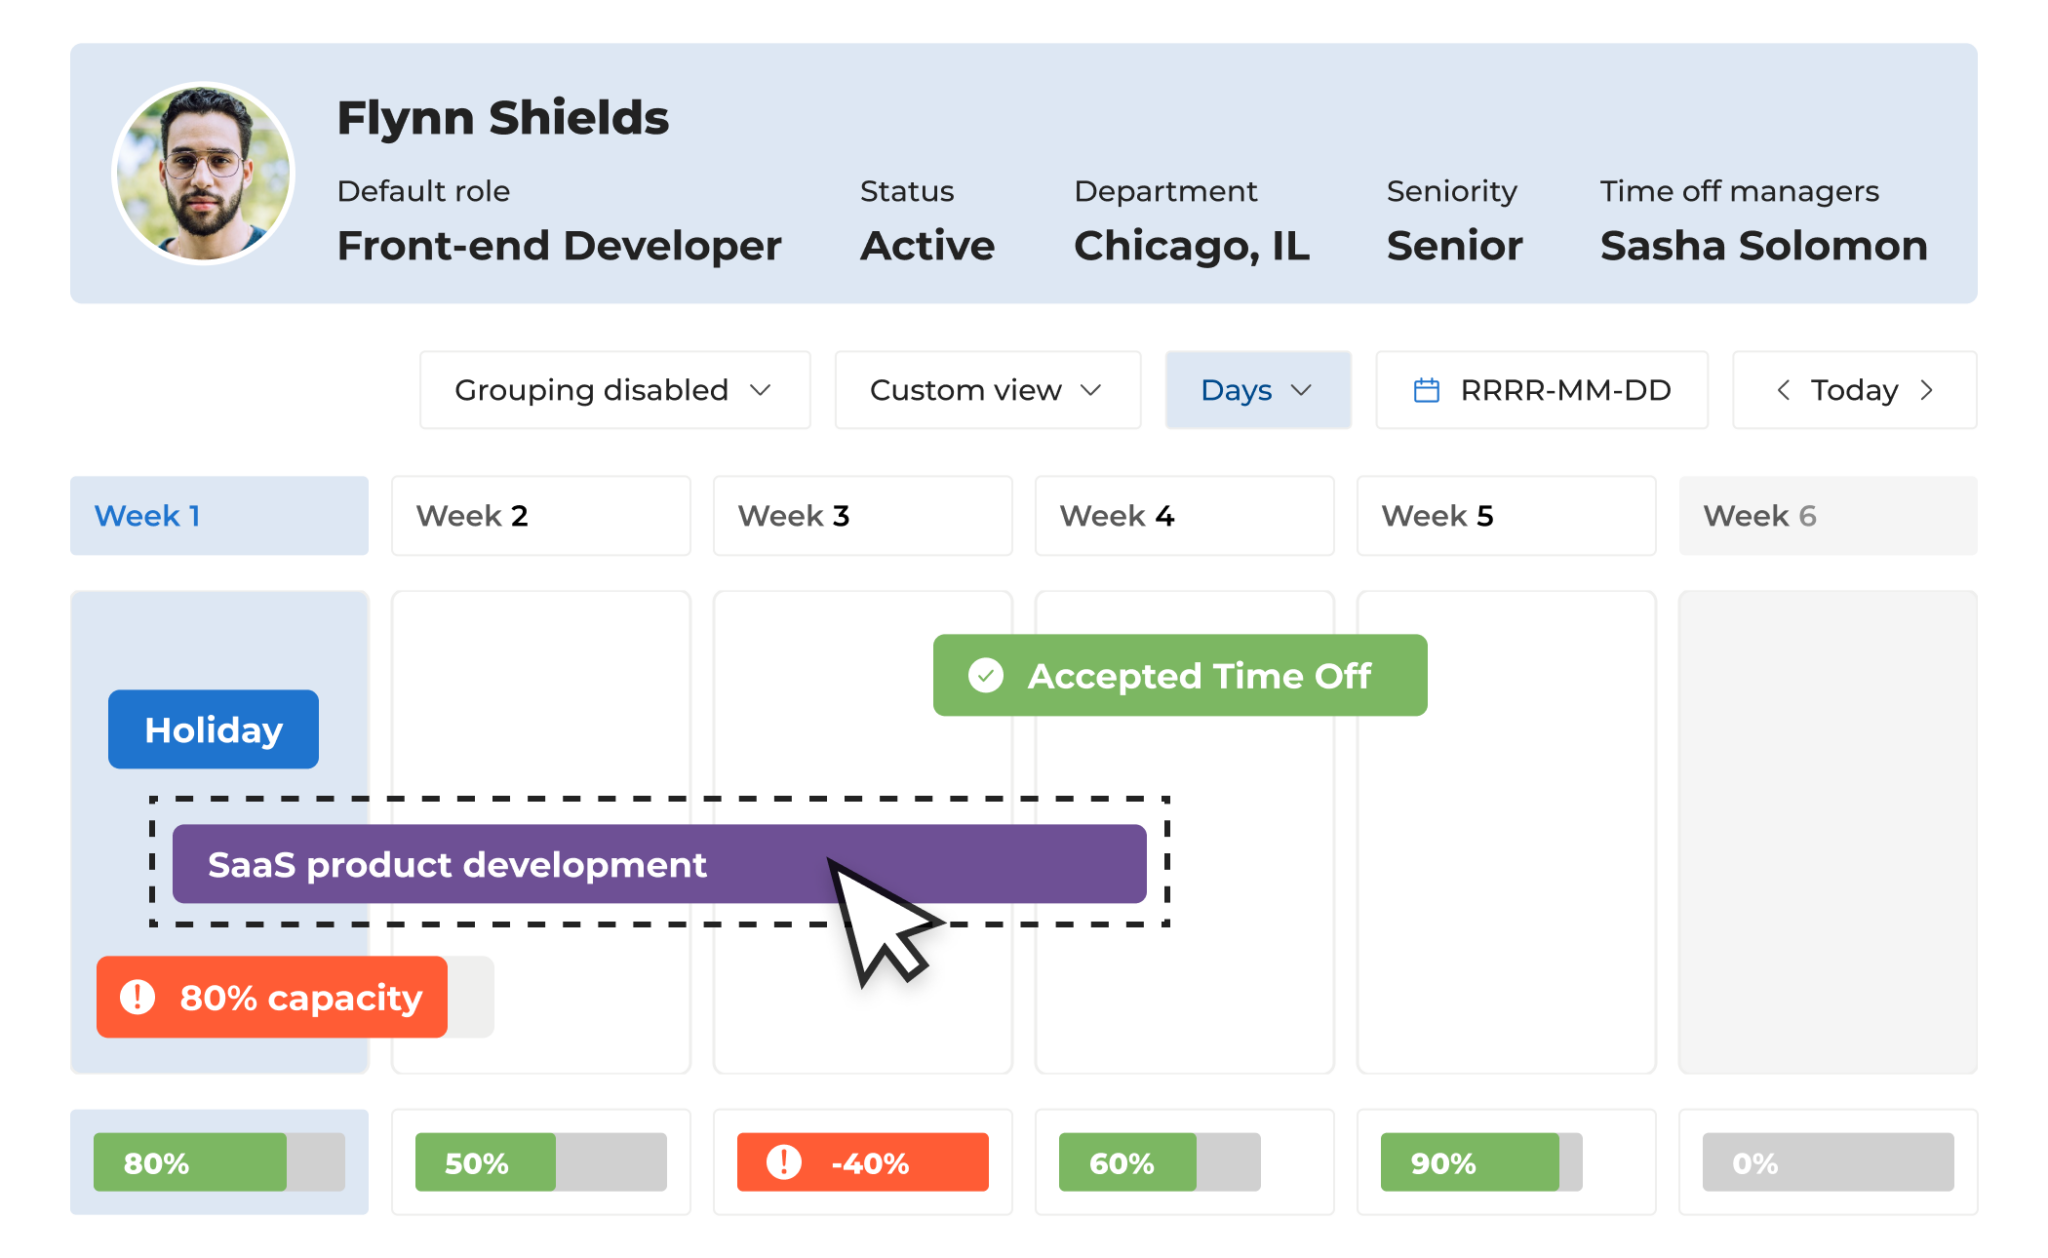
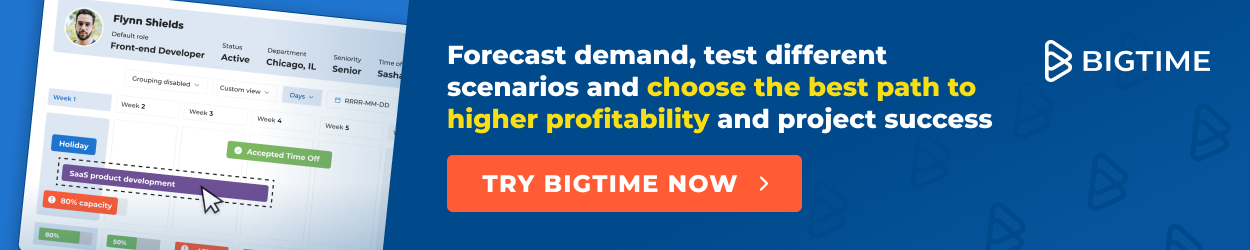
An example of precise planning in Gantt charts for an individual employee in BigTime
Gantt charts are particulary famous for their flexibility. This type of project timeline offer deep insight into interdependent tasks and allow project managers to change them freely—ideal for projects with many moving parts.
Kanban Timeline
Kanban timeline combines Kanban boards (visual task tracking columns like “To Do,” “In Progress,” “Done”) with a timeline overlay to track the time-based progress of cards/tasks. This more visual format is best for Agile and iterative workflows, as it allows for swift adjustments and changes – project managers can simply drag tasks to change their status and alter priorities.
Critical Path Method
Critical path method (also known as CPM) identifies the longest chain of dependent tasks (the “critical path”) that determines the minimum project duration, ensuring the project is moving forward smoothly with minimal disruptions.
This approach to individual tasks clearly showcases that this type of project timeline is very goal-oriented. As a result, it is best suited to time-sensitive, high-stakes projects and is commonly used in engineering, construction, or complex service delivery.
Program Evaluation and Review Technique (PERT)
The Program Evaluation and Review Technique (PERT) is a project management tool used to analyze the work breakdown structure in a project. Unlike linear timelines, a PERT chart is a network diagram that focuses on the sequence of activities and the estimated time needed to complete them, as well as optimistic and pessimistic scenarios for task dependencies.
Naturally, this complex type of project timeline is best for large companies. Additionally, it is not a good choice for small, straightforward projects; instead, PERT could be beneficial for larger operations with uncertain timelines or multiple parallel tasks.
How to Create a Project Timeline
Project timelines serves as a guide to your project’s success. Still, their efficiency highly depends on its quality – and achieving it is often not as straightforward as we would like it to be. Fortunately, the right techniques can change that.
Here’s how to approach project timeline creation to achieve perfect results.
What does a project timeline consist of?
First, let’s start with the things your project timeline should have by the end of your journey.
Ideally, it should contain:
- Project stages or tasks (whichever fits your project best).
- Their duration, start dates, and end dates.
- Dependencies — for example, if one task needs to be completed before another can start.
- Team members, their capacity, and allocations.
Now, let’s see how it works in practice.
6 Steps to Create a Project Management Timeline
The process of creating a project management timeline usually takes just a few steps. They include:
1. Define the Scope of Your Project
That’s the simplest step — you need to figure out what needs to be done for the project to succeed.
Specify the Requirements
First, you need to talk to your client to discuss the basic details of the project. By the end of this conversation, you should have:
- Project description and the background information needed to complete it.
- Main objectives and/or project milestones.
- Project goals, including target audience, desired features, and general outcomes.

Learn More Details About the Project
However, these factors are insufficient for the project timeline — they must be much more specific. That’s why you can now move on to organizing the project scope after you’ve gathered all the information above.
At this point, you should:
- Write a project statement that specifies what the project aims to accomplish.
- Create a list of stages and tasks in the project, as well as their dependencies.
- Perform basic resource forecasting to establish what resources are required for the project and whether you have a project team for the job.
- Specify the desired start and end date for the project and its stages.
- Prioritize the tasks accordingly.
- Consult other project managers who may have experience in similar projects.
Having done that, you can now organize the information even further — it’s time to divide your projects into smaller pieces and include your team in the equation and timelines themselves.
2. Split the Project Into Parts
Once you know what you have to do to succeed, it’s time to take a closer look at all the necessary operations, their scope, and milestones that mark their progress.
Dividing the Project Step by Step
First, divide the project into stages, marking the significant developments in the project. For each of them, select a milestone showing you the exact goal you must achieve for the project to proceed. Don’t forget to determine the task dependencies and dates if they are critical for the tasks!
From there, split the stages into small, manageable tasks and place them chronologically. Once again, include task dependencies when necessary. We highly recommend using project management software for that step — it makes the work much easier.
After doing that, you will have a draft version of the project timeline.
3. Determine the Time and Resources Needed to Complete Each Phase or Task
If you paid attention to the previous step, you already have a list of tasks that need to be done. Now it’s time to check what they need to be completed on time.
To do that, analyze each task or stage and determine:
- What actions will the task involve?
- How much time will it take to complete each of them?
- What skills or sets of skills will be required to complete the task?
- How much time will be required for each skill?
- How much money each task will cost?
- How do the costs compare to the budget?
After completing all of the steps above, you will be able to see how long each stage will take and what resources it requires.
4. Assign Tasks to Specialists
Finally, if you have already broken down each task into pieces, you can use your newly acquired knowledge to start project scheduling.
Start the process with capacity planning — check the availability of resources and other duties they need to perform and establish the number of hours they have available.
Then, compare your desired project plan to the availability of resources you wish to involve in the project. At this point, you can start resource planning — begin by allocating specialists whose schedules do not conflict with your project schedule. Then, move on to the employees you wish to add to your project, but for whatever reason, you cannot do that. Consider allocating them part-time, or replace them with other employees.
Last but not least, verify whether your project has any vacancies that need to be filled. While this step might seem trivial, it may be the difference between success and failure!
5. Put All the Tasks on the Timeline and Perfect Your Plan
If you have and have already allocated your resources, you have your project timeline in a calendar or Gantt chart. However, if you use Excel for your resource management plan, you still need to take one more look at your project timeline.
Manage Your Project and Its Tasks
At this point, you should pay close attention to problems such as:
- Vacancies or tasks that were not assigned to any specialists and team members.
- Benches or overtime included in the plan — this should be avoided as much as possible.
- Dependencies that are at risk of failing.
- Any other risks that may affect the project.
Eliminate all of the above problems whenever possible — if they accumulate, they may put your project at risk.
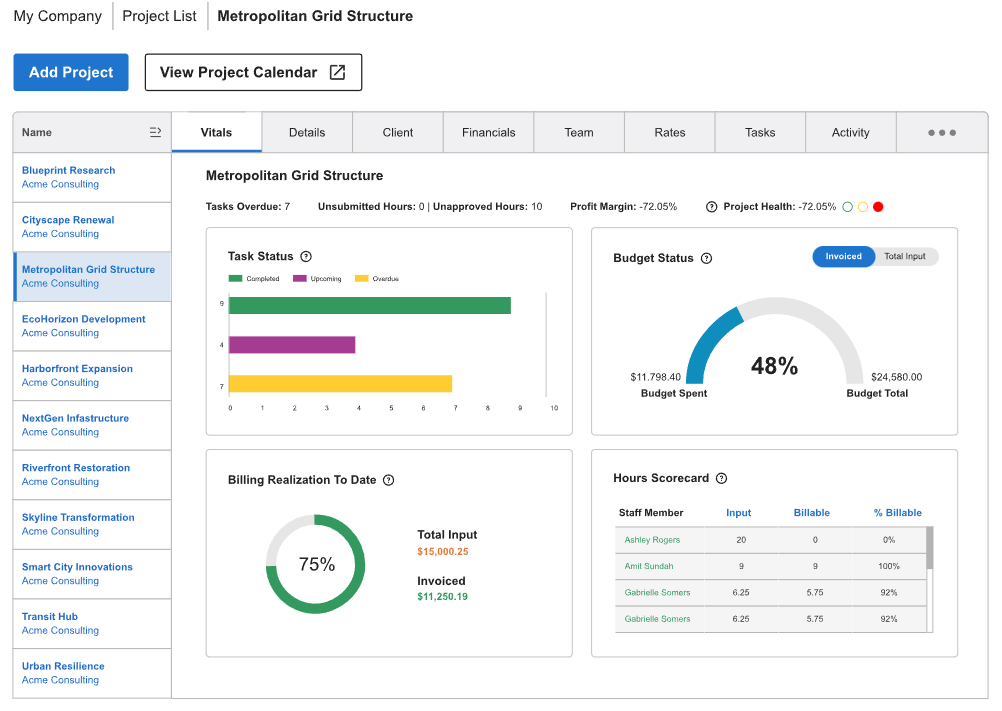
An example of an overview of project timeline in BigTime
However, if you have already done that and found no wrongdoings, you are good to go — your project timeline is ready!
Project Timeline Example for Professional Services Companies
In a project timeline example for a professional services project, a Gantt chart timeline could delineate phases like discovery, solution design, and implementation. For instance, a management consulting team at a professional services firm might use a timeline tool to coordinate milestones and track deliverables as they help a manufacturing client streamline operations.
- Discovery phase: The consulting team sets a three-week window to conduct interviews, review internal processes, and analyze key performance data across departments.
- Solution design phase: Over the next four weeks, the consultants develop a custom strategy that includes process improvements, tech integration recommendations, and a change management roadmap.
- Implementation support: In the final six-week phase, the team works with the client to roll out the new processes, host training sessions, and monitor early KPIs, making weekly adjustments based on feedback.
With the Gantt chart timeline, the consulting team can easily monitor task dependencies, reassign resources when delays occur in solution modeling, and keep both their internal team and the client aligned—ultimately ensuring a smooth rollout and measurable operational improvements.
Benefits of a Project Timeline
Why should you even consider spending your precious time creating a timeline in the first place? There are a few good reasons.
- Clear overview of the entire project. No one wants to be kept in the dark, whether they are managers or employees. With a project timeline, you know exactly what lies ahead — and you can share this knowledge with specialists and executives alike.
- Mistakes can’t hide! There’s no denying that planning is a complicated process prone to human error. However, creating a timeline can simplify it and help you correct any mistakes.
- Reach your goal. Sometimes you can get lost in tasks and responsibilities. A project timeline helps you keep your eyes on the goal, no matter what happens.
- Tracking progress is easier. A project timeline shows you everything that is supposed to happen in the project — and later on, you can use it to see what’s actually happening in it.
- There are no bottlenecks in the project. Without a project timeline, work tends to pile up and create chaos no one wants to deal with. It’s better to resolve these issues before they put the entire operation at risk!
Can I Create an Accurate Project Timeline Templates in Excel?
For small companies and even smaller projects, Excel is one of the essential tools for creating project timelines. However, for business that aim to scale in the future, project timeline templates in Excel are definitely not enough. Why?
Limitations of Project Timeline Template in Excel
An Excel project timeline is not a perfect tool — especially for service companies that manage several specialists and projects at once. That’s because the tables are not meant to act as project management software, and they lack the big picture necessary for the job, not to mention the milestones and timeline templates in general.
For example, in the Excel project timeline template, you cannot:
- View each of the stages, milestones, and tasks, as well as their details.
- Create a list of allocations and responsibilities for each team member (you need an additional spreadsheet for that!) and the project team as a whole, from start to finish.
- Monitor work progress for each stage, task, or employee.
- Flexibly edit allocations and stages whenever necessary.
- Monitor budgets and spending — again, you need another spreadsheet for that.
- Collaborate with your employees or teammates and exchange information with them in real time.
- Monitor the progress on all the important milestones.
Looking at the list above, it is no surprise that numerous service companies choose to look elsewhere for their project timeline tools.
Streamline Your Project Timelines with BigTime
Looking for a tool that makes creating and managing project timelines even easier? BigTime’s robust project management software offers all the features you need to keep projects on track.
From task scheduling to resource allocation and real-time project tracking, BigTime ensures you have complete visibility into your timelines and project performance. Learn how BigTime can help you streamline your project timelines and boost efficiency.